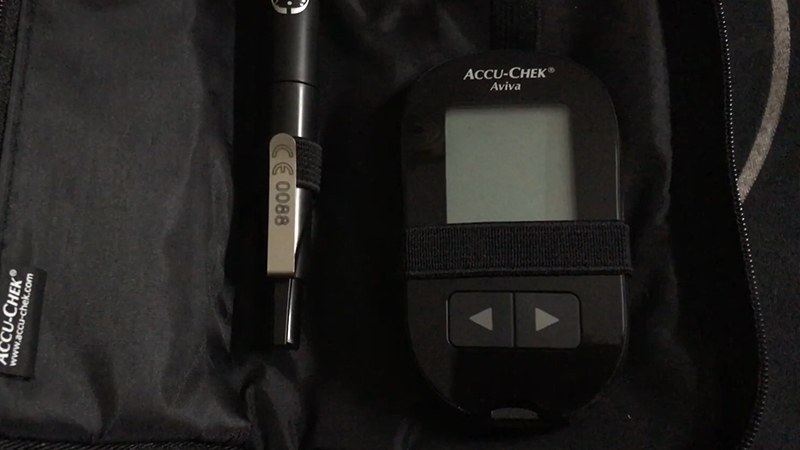
The ACCU-CHEK Error 7 is a frequent stumbling block for individuals reliant on ACCU-CHEK blood glucose meters for their diabetes management.
It’s a message that signifies a disruption in the glucose monitoring process, and understanding both the causes and fixes for this error is crucial in maintaining reliable blood glucose readings.
Error 7 can be attributed to a variety of issues, ranging from incorrect test strip insertion and damaged or expired test strips to meter malfunctions, incorrect coding, inadequate blood samples, low battery, meter contamination, and susceptibility to extreme temperatures.
In this discussion, we will explore Accu chek error 7- causes and fixes to help individuals overcome the ACCU-CHEK Error 7 and regain control over their glucose monitoring.
What Is Accu Chek Error 7?
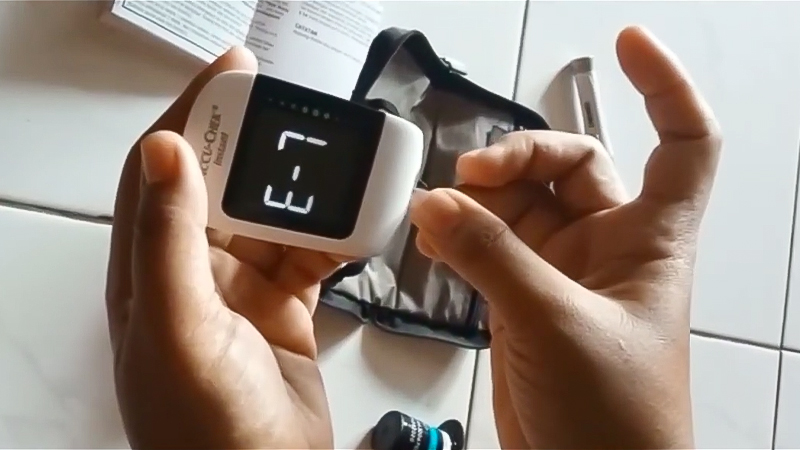
The ACCU-CHEK Error 7 is a specific error message that can occur on ACCU-CHEK blood glucose meters. This error typically indicates a problem with the test strip or the meter itself.
Error 7 usually appears when the test strip is not inserted properly into the meter or there is an issue with the test strip, such as damage or contamination. It can also occur if the meter is malfunctioning.
When the ACCU-CHEK Error 7 is displayed, it means that the meter cannot read the test strip or the blood sample accurately, leading to an unreliable blood glucose measurement.
To resolve this error, it’s important to check the test strip to ensure it is clean, undamaged, and properly inserted into the meter. If the error persists, try using a new test strip and make sure it is inserted correctly.
If the problem continues, it may be necessary to contact the manufacturer’s customer support for further assistance or consider replacing the meter if it is found to be malfunctioning.
Always follow the manufacturer’s guidelines and consult with healthcare professionals for accurate blood glucose monitoring.
Accu Chek Error 7 – Causes
The ACCU-CHEK Error 7 is a common issue faced by users of ACCU-CHEK blood glucose meters. Here are some potential causes:
Incorrect Test Strip Insertion
One of the most frequent causes of Error 7 is the improper insertion of the test strip into the meter. If the test strip isn’t fully and correctly inserted, the meter cannot read it, leading to an error message. It’s vital to ensure the strip is firmly seated in the designated slot.
Damaged or Contaminated Test Strips
Error 7 can occur when the test strips are damaged, dirty, or contaminated. Any visible defects or foreign substances on the test strip can hinder the meter’s ability to provide accurate readings.
Expired Test Strips
Using expired test strips is another common cause of Error 7. Test strips have a limited shelf life, and using them after their expiration date can result in unreliable readings and errors.
Meter Malfunction
Sometimes, the meter itself may be malfunctioning, and this can trigger Error 7. A technical issue within the meter can impede its ability to read the test strips correctly.
Incorrect Coding
If the meter requires coding and it is not properly coded to match the code on the test strip vial, it can lead to Error 7. Correct coding is crucial for accurate readings.
Inadequate Blood Sample
Error 7 can occur when there’s an insufficient amount of blood applied to the test strip. Ensuring an adequate blood sample is crucial for reliable readings.
Low Battery
When the meter’s battery is running low, it may not function correctly, leading to errors like Error 7. Regularly check and replace the batteries to avoid this issue.
Meter Contamination
A dirty or contaminated insertion point on the meter can interfere with the proper insertion and reading of the test strip, causing Error 7. It’s essential to keep the meter clean and free from contaminants.
Extreme Temperatures
Exposure to extreme temperatures, either too hot or too cold, can damage both the meter and the test strips, leading to Error 7. Protect your meter and test strips from extreme conditions to prevent errors associated with temperature damage.
Identifying and addressing these potential causes can help users manage and troubleshoot ACCU-CHEK Error 7 more effectively, ensuring accurate blood glucose monitoring.
What Is Accu Chek Error 7 – Fixes
Accu-Chek error 7 is a common issue encountered by users of Accu-Chek glucose meters. This error typically indicates a problem with the test strip or the meter’s connection with the strip.
Here are some fixes to address Accu-Chek error 7:
Check Test Strip
The first step is to ensure that the test strip is not expired or damaged. Examine the strip for visible signs of damage or contamination. If it appears fine, insert a new, unexpired strip and retest.
Clean Meter and Hands
Sometimes, residue on the meter’s connection points or on your hands can interfere with the strip reading. Clean both the meter’s connection points and your hands thoroughly, ensuring they are dry before inserting the strip.
Avoid Bright Light
Bright light can affect the test strip’s functionality. Move to a shaded area or shield the meter and strip from direct sunlight or intense indoor lighting during the testing process.
Proper Insertion
Ensure the test strip is inserted correctly into the meter. Align the strip’s gold contacts with the meter’s electrodes, making sure it fits snugly. Improper insertion can lead to error readings.
Meter Reboot
Sometimes, a simple reboot can resolve the error. Remove the batteries, wait for a few seconds, and then reinsert them. Power on the meter and try the test again.
Temperature and Humidity
Extreme temperatures and humidity can affect the accuracy of the test strip. Store both the strips and the meter in a cool, dry place within the recommended temperature and humidity range.
Calibration Check
Ensure the meter is calibrated correctly. Some Accu-Chek meters require periodic calibration with a control solution. Follow the user manual instructions to perform a calibration check.
Contact Customer Support
If the error persists despite trying the above steps, it’s advisable to contact Accu-Chek customer support. They can provide specific troubleshooting guidance based on your meter model and might offer a replacement if necessary.
Regular Maintenance
Regularly clean the meter and its components as per the user manual instructions. Keeping the meter clean and well-maintained can prevent errors and ensure accurate readings.
By following these fixes, users can troubleshoot Accu-Chek error 7 and ensure reliable glucose readings, promoting effective diabetes management.
FAQs
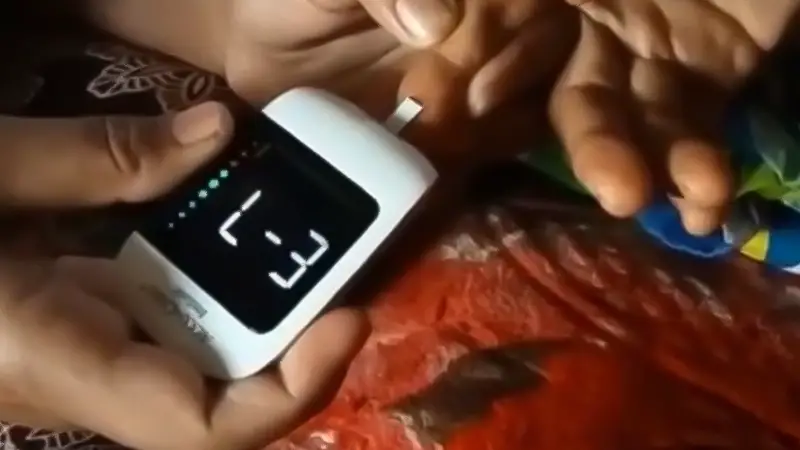
What is the difference between ACCU-CHEK E3 and Error 7, and how can I distinguish between them?
ACCU-CHEK E3 and Error 7 are different error messages on ACCU-CHEK meters. E3 typically relates to issues with test strips, while Error 7 can stem from incorrect test strip insertion, contamination, or other causes. To distinguish them, note the specific error code displayed on your meter.
What are the common causes of ACCU-CHEK E3 and Error 7 errors?
For ACCU-CHEK E3, common causes include expired test strips, incorrect coding, inadequate blood samples, dirty or damaged strips, meter malfunctions, low battery, extreme temperatures, and meter contamination.
How can I prevent ACCU-CHEK E3 and Error 7 errors due to test strip problems?
To prevent E3 and Error 7 caused by test strip issues, ensure your strips are not expired, apply an adequate blood sample, and inspect strips for contamination or damage. Proper storage and handling are key to maintaining strip integrity.
What should I do if I encounter ACCU-CHEK E3 or Error 7 on my meter?
For E3, ensure proper strip insertion, code the meter correctly, and use clean, undamaged strips. For Error 7, verify correct strip insertion, examine strips for contaminants, and replace if expired.
Are there specific maintenance steps to minimize ACCU-CHEK E3 and Error 7 errors in the long term?
Regular maintenance includes proper storage of test strips, keeping the meter’s insertion point clean, and replacing batteries when necessary.
Adhering to these practices can help reduce the occurrence of both ACCU-CHEK E3 and Error 7 errors and ensure accurate blood glucose monitoring.
Conclusion
Navigating the ACCU-CHEK Error 7 is essential for those who rely on blood glucose meters for their diabetes management. A comprehensive understanding of the causes and fixes associated with this error empowers individuals to ensure accurate readings and maintain their health.
By addressing the root causes—such as ensuring proper test strip insertion, checking for contamination, avoiding expired strips, and monitoring the meter’s condition—users can minimize the occurrence of Error 7.
The fixes outlined, including troubleshooting steps, battery maintenance, and vigilant temperature control, provide practical solutions to overcome this common challenge.
Through this knowledge, individuals can confidently manage their blood glucose levels, ensuring their well-being and continued health.
Hi, I’m Mark Pattinson and I’m a freelance personal trainer. I’ve been working in the fitness industry for over 10 years especially since I work with diabetes patients and I love helping people achieve their fitness goals. I believe that everyone can benefit from a good workout, and I’ll do everything to make sure you get the most out of your training.